

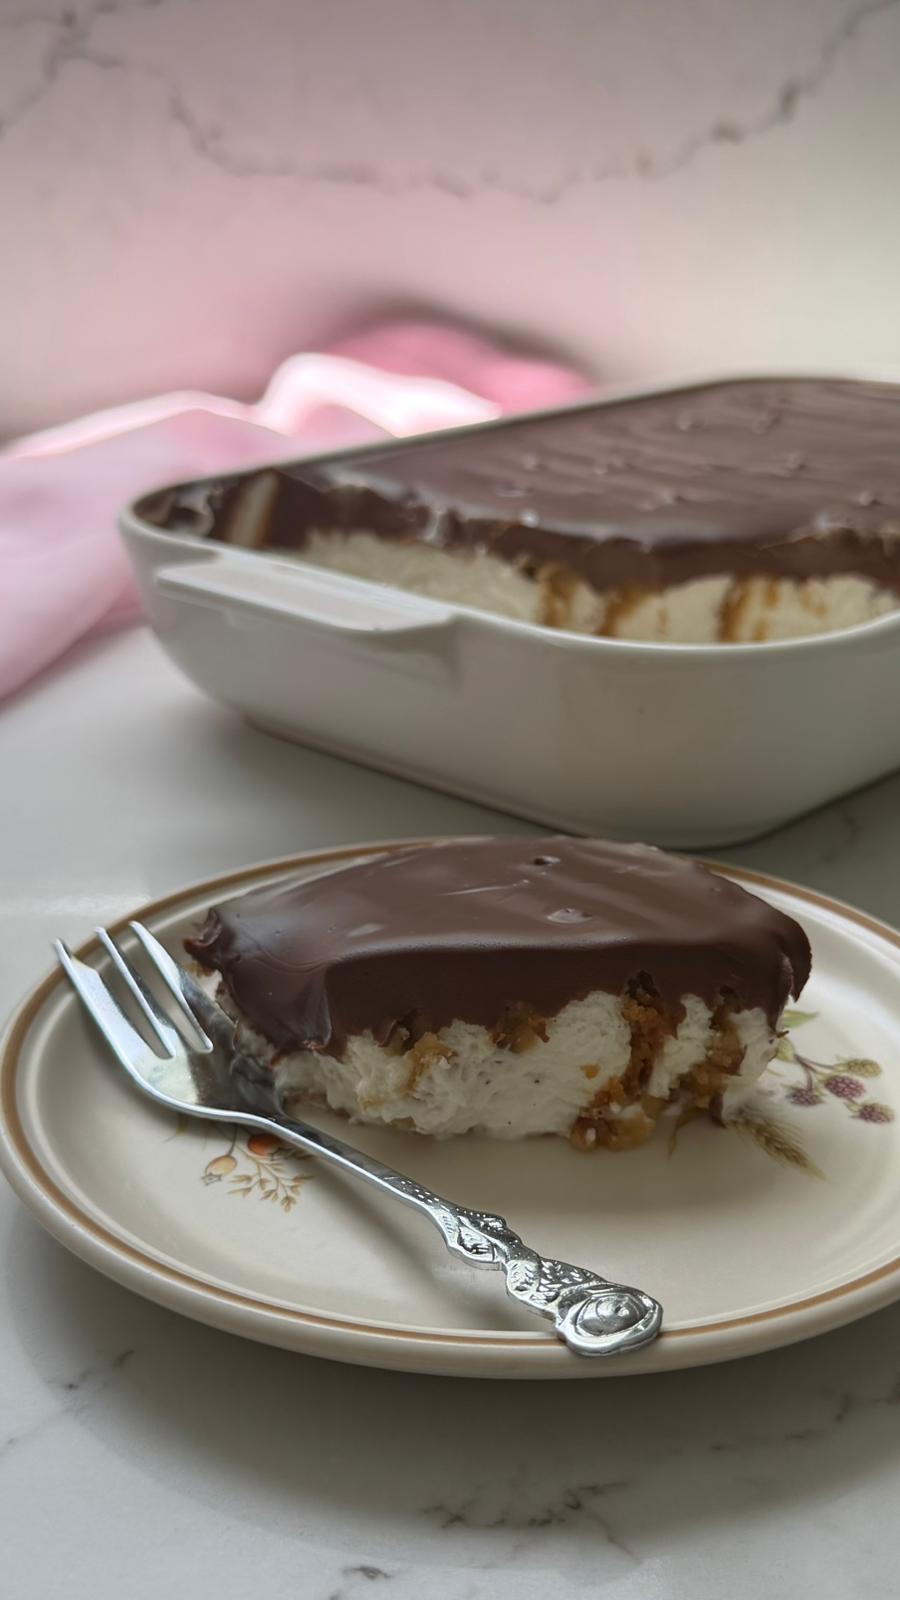
Standing Biscuit Cake is definitely a trend that couldn’t pass us by,
so let’s make it together in its beautiful, nourishing, and delicious Essy Roz version 🙂
And this time, there’s also a winning vegan option,
which honestly makes it hard to decide which version is even better.
We’ll make the biscuits ourselves in just a few quick minutes, and while they’re in the oven we’ll whip up the cheesecake cream.
This cake is so delicious and so easy to make, and the magic of preparing the whole thing at home, including the biscuits, completely steals my heart 💜
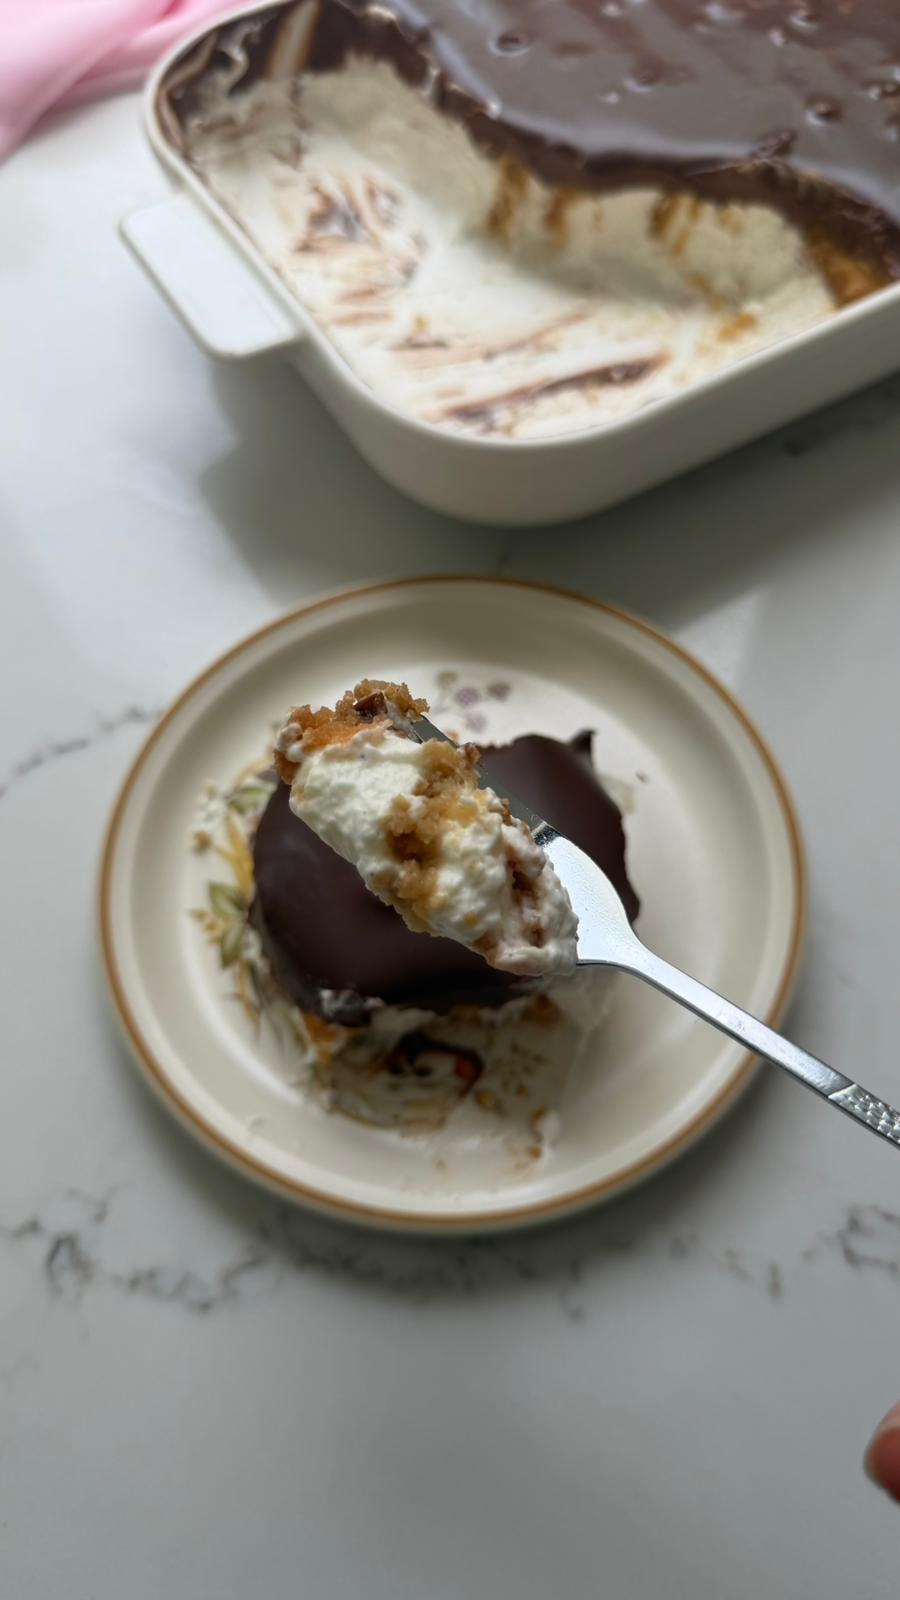
Standing Biscuit Cake | Photo: Essy Roz
Standing Biscuit Cake
Ingredients
Fits a large rectangular / square cake pan
I used a 40x22 cm pan, but you can definitely play with the pan size according to what you have at home
Ingredients for the biscuits:
- Half a cup of almond butter
- One-third cup maple syrup
- A tiny pinch of salt
- 1¼ cups oat flour (can be replaced with 1½ cups almond flour)
- ½ teaspoon baking powder
For the cheesecake cream:
- 500 ml whipping cream (can be replaced with plant-based whipping cream)
- 100 grams powdered sugar
- 1 teaspoon vanilla extract
- 500 grams classic white cheese (can be replaced with your favorite vegan cream cheese)
For the chocolate cream topping:
- 200 grams dark/milk chocolate
- 250 ml sweet cream / plant-based cream
- A pinch of salt
Preparation
We’ll start by making the biscuits.
Preheat the oven to 175°C, preferably on turbo mode.
In a bowl, mix together the almond butter, maple syrup, and salt. Add the almond flour and baking powder and form a dough ball that’s easy to work with. (If your dough is a little sticky, add 2-3 tablespoons of almond/oat flour. If it’s too dry, add 2-3 tablespoons of maple syrup. It should come out perfect without needing adjustments.)
Roll out the dough to an even thickness between two sheets of baking paper using a rolling pin. Cut it into rectangles, trying to match the biscuit thickness to the depth of your cake pan.
Transfer the dough together with the baking paper underneath onto a baking tray and bake for 8-12 minutes, until the dough is set and lightly golden. It hardens after fully cooling.
Now let’s move on to the cheesecake cream.
Whip the cream until you get a whipped cream that isn’t overly stiff. Add the powdered sugar and vanilla extract, mix, and gently fold it together with the cheese.
Pour all the cheesecake cream into the cake pan and spread it evenly across the entire pan. (Try to leave enough room in the pan for the biscuits and the chocolate cream.)
Arrange the biscuits standing upright inside the cheesecake cream, horizontally, so their edges face up and down while the flat sides face the sides of the pan.
Place them in rows close to one another for a rich and indulgent bite.
At this stage, prepare the chocolate cream.
Place all the chocolate cream ingredients into a bowl and melt them in 30-second microwave pulses unti smooth and uniform.
Let the bowl cool for a few minutes at room temperature. It’s important that the chocolate cream stays pourable but is no longer hot. Carefully pour the chocolate cream over the entire cake, not all in one spot,
and spread it evenly to cover everything.
Transfer the cake to the refrigerator for at least 3 hours, preferably overnight, so it can chill and set beautifully. Remove it from the fridge and serve it to your loved ones with a spoon and lots of joy in your heart
A little more from me:
- You can keep the cake in the refrigerator, covered or in an airtight container, for up to 5 days.
- You can also make the dessert deconstructed in serving cups, or simply place a biscuit on a plate, top it with a generous spoonful of cheesecake cream, and drizzle chocolate cream over everything.
- The cake can absolutely be made a day before serving.
- You can also make just the biscuits without the cake and enjoy perfect homemade biscuits for up to 4 days.
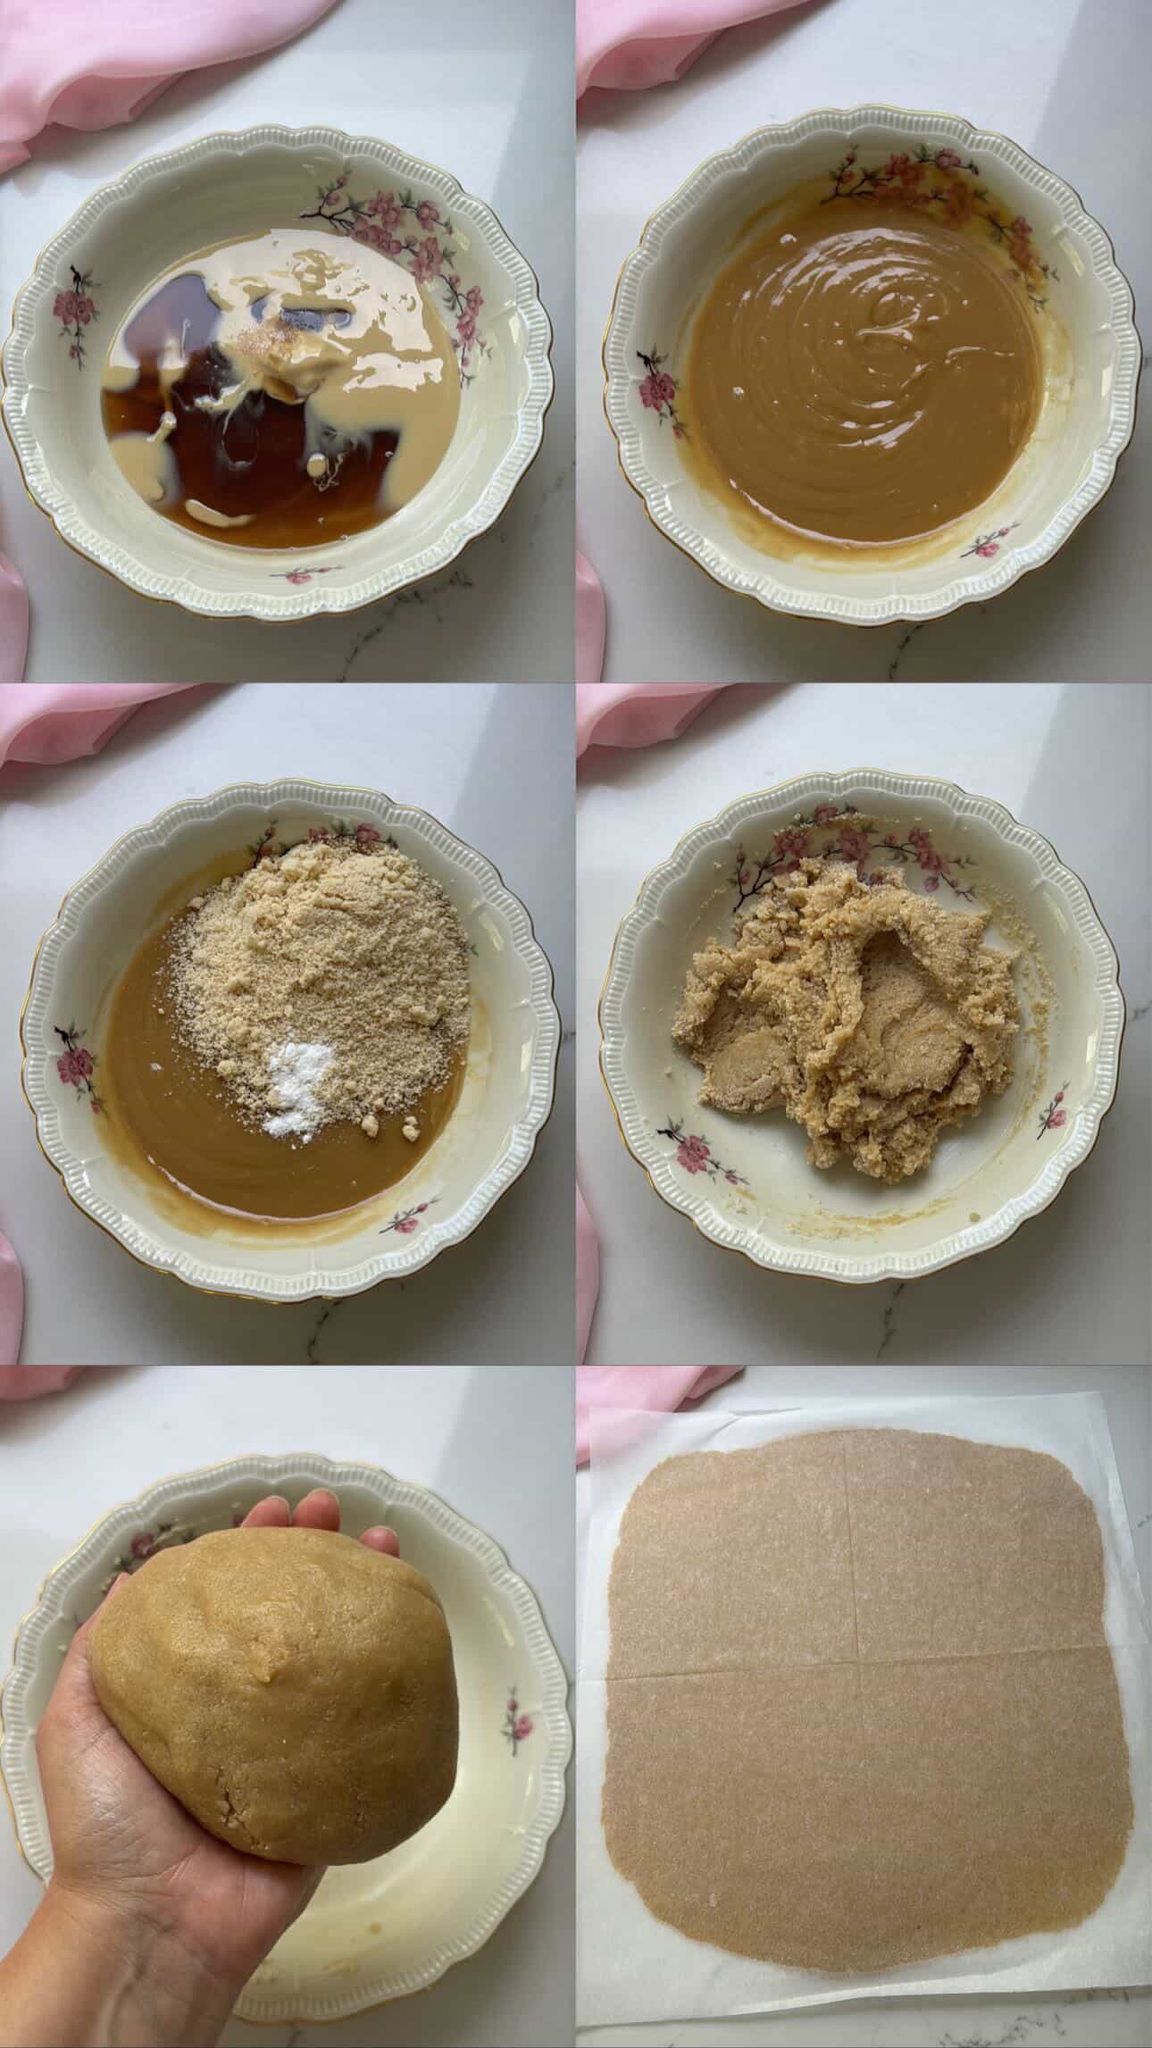
Standing Biscuit Cake – Preparation Steps | Photo: Essy Roz
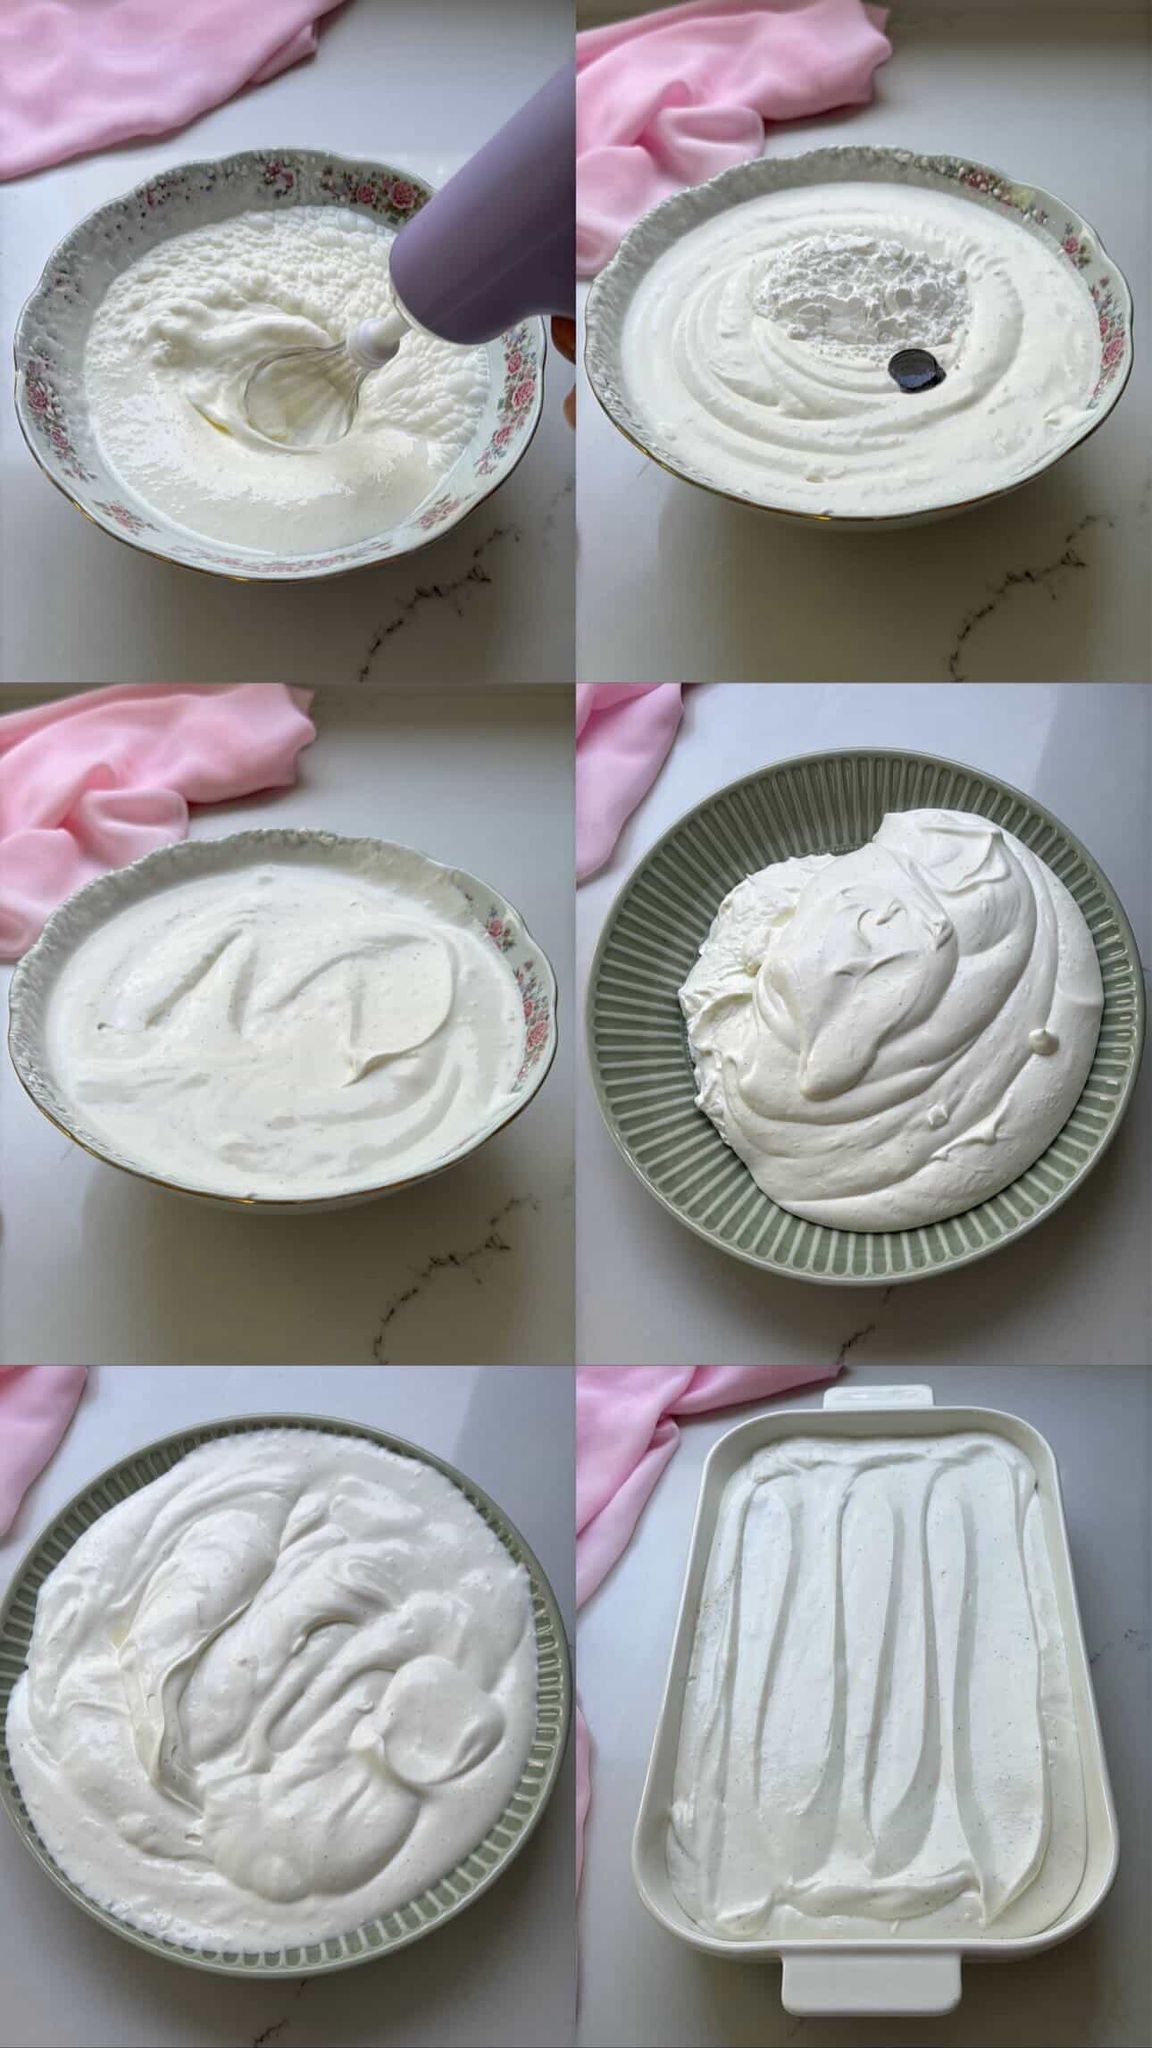
Standing Biscuit Cake – Preparation Steps | Photo: Essy Roz
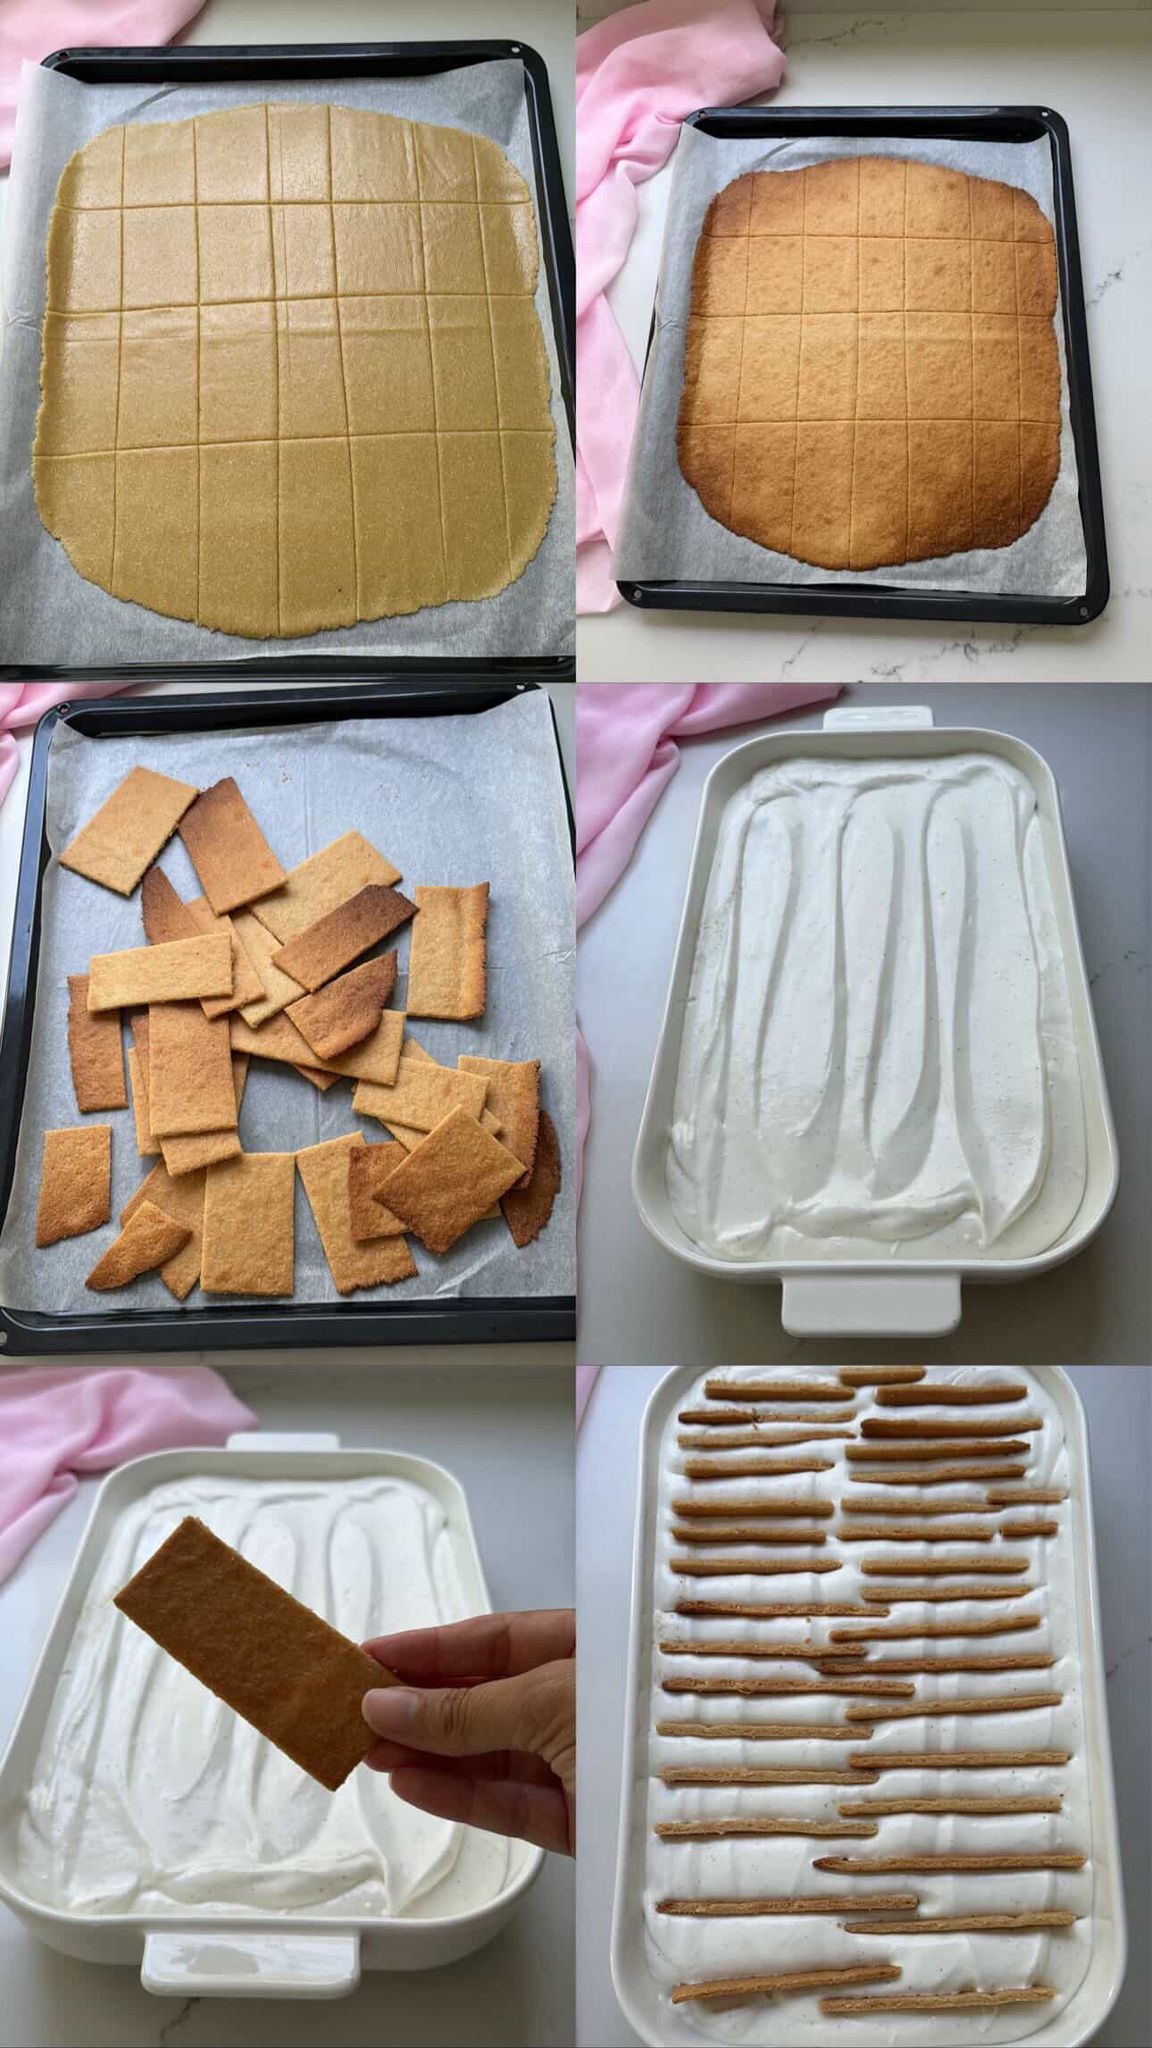
Standing Biscuit Cake – Preparation Steps | Photo: Essy Roz
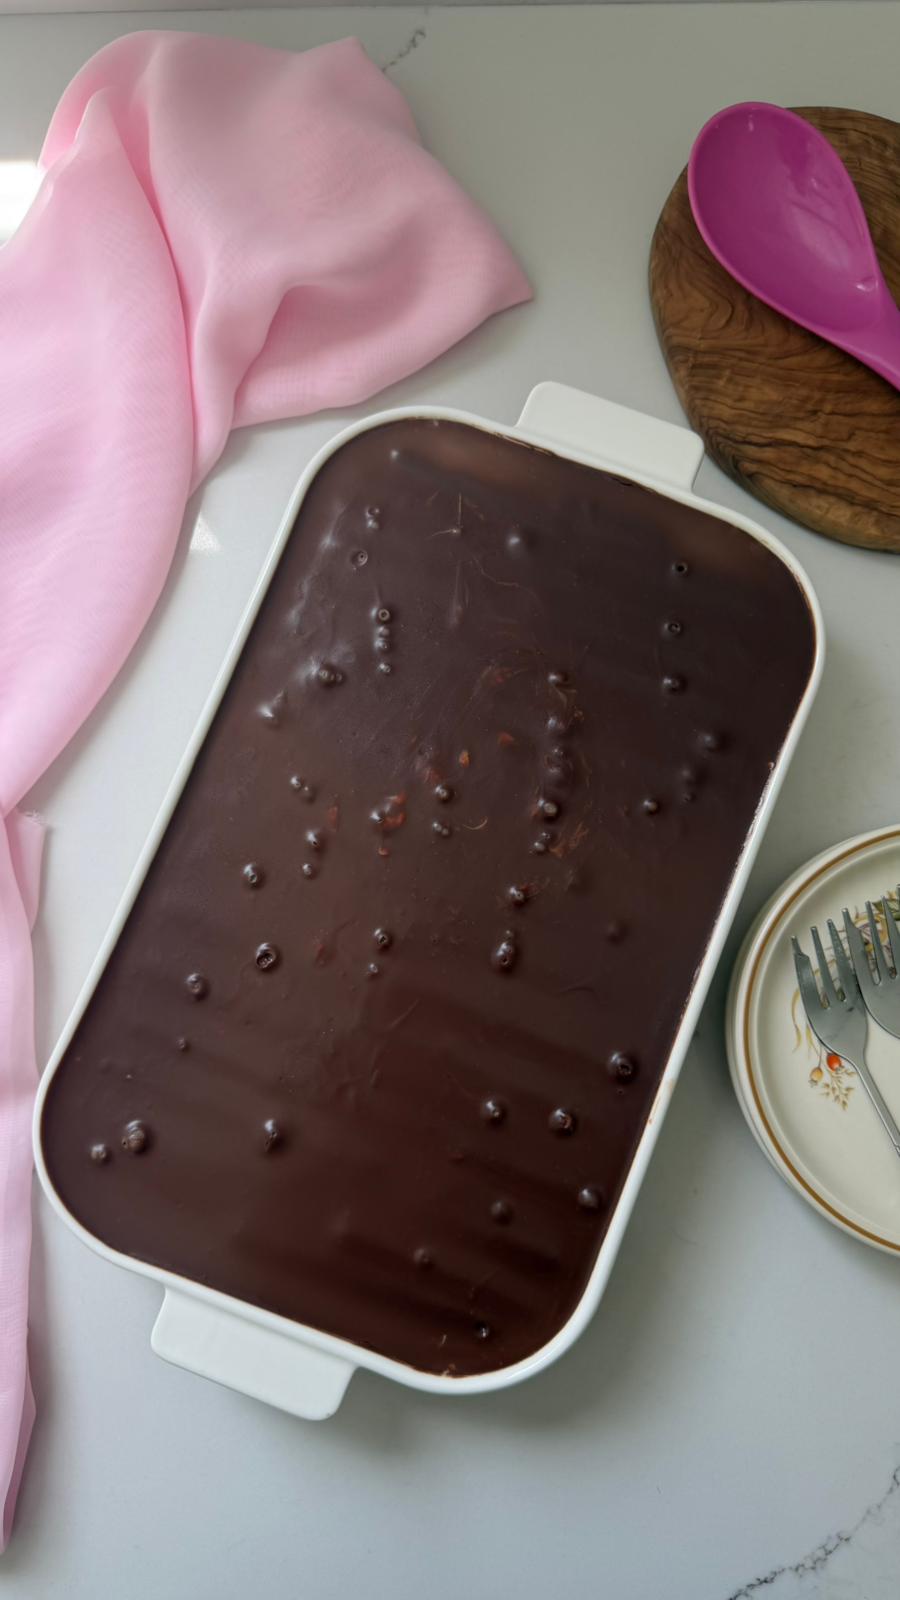
Standing Biscuit Cake | Photo: Essy Roz




No Comments